This is part 1 of a 2 part series on setting up Continuous Integration (CI) and Deployment (CD) for your Visual Studio Projects. Finished part 1? See part 2 here on Continuous Deployment.
Before we start be sure to create a new application in Visual Studio 2017 or open up one of your existing applications. For this tutorial we created a new ASP.NET web application (using .NET framework).
1. Assuming you do not have your application added to Source control, here are the steps to add it:
- Right click on your solution in Solution Explorer – “Add Solution to Source Control…”
- If you are prompted to choose which type of source control we recommend Git. I think in VS 2017 it will set it to Git by default anyway. To confirm this open your Team Explorer window and click “Manage Connections”. You should see your project listed under “local Git Repositories”.
2. Open your browser and set up a new online Visual Studio Team Services project. This is a free online source control repository that also provides free Continuous Integration functionality. The steps are as follows:
- Either sign into your existing account at https://your-account.visualsudio.com or set up a new free account here.
- Create a new project, give it a name (it doesn’t have to match your local solution name) and make sure your version control type matches your local version control – we use Git for this example.
- Close browser, that’s all for now as we will link into it from within Visual Studio in the next stage
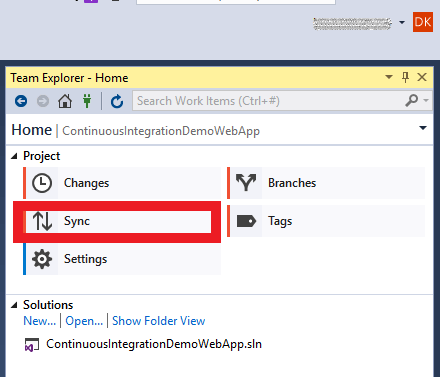
3. Add your local GIT repo to your the online Visual Studio Team Services –
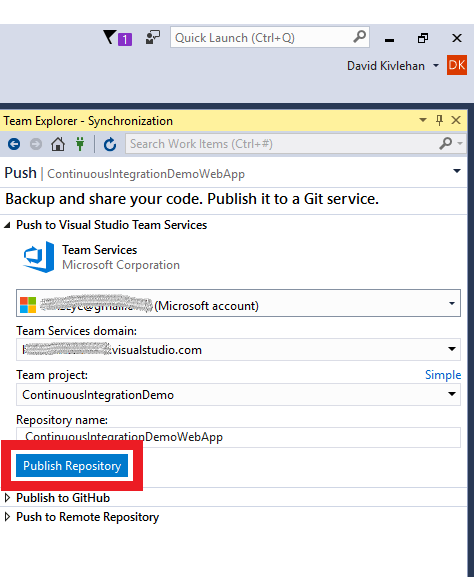
- Click on Team Explorer window -> click “Home” -> click “Sync” -> click “Publish Git Repo” inside of the “Publish to Visual Studio Team Services” area -> click “Publish Repository”.
- Note that we found a bit of a bug here (as of 23/04/2018) where we clicked on our account name in the “Publish to Visual Studio Team Services” area that appeared and nothing happened – to fix just click “Add an Account” in the dropdown and log in again when prompted and this seems to trigger it properly.
- Note be sure to click on “Advanced” here and choose your VSTS project that you created earlier in the browser.
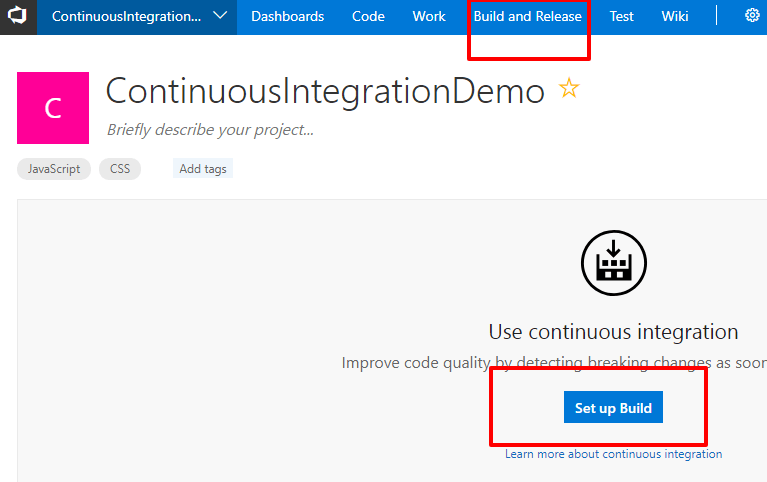
4. Sign in to your VSTS account again in your browser:
- Select your project – You can set up your CI build using either of the links highlighted below.
- Select VSTS Git
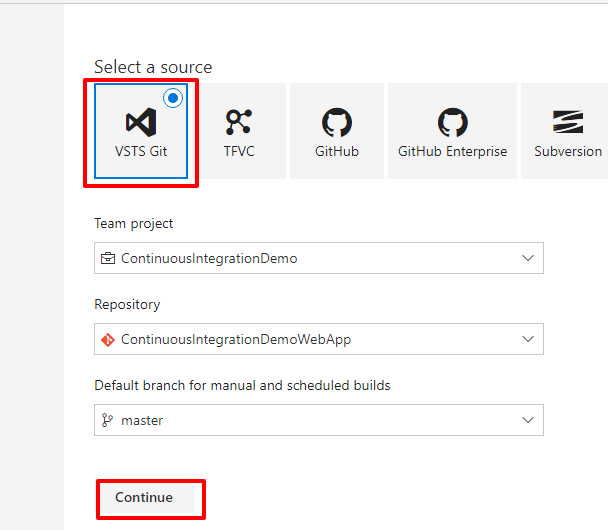
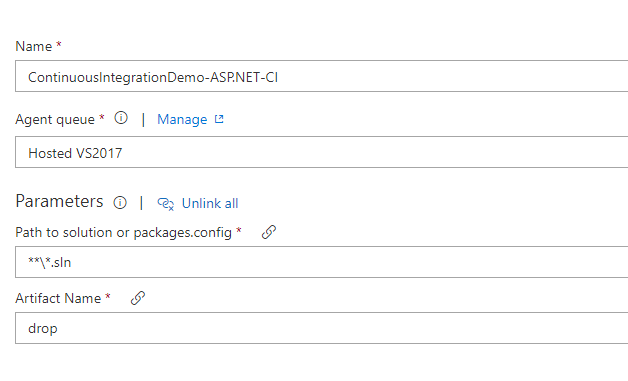
- Select the template that matches your project template. My project was an ASP.NET web app using the .NET framework so I choose ASP.NET web app:

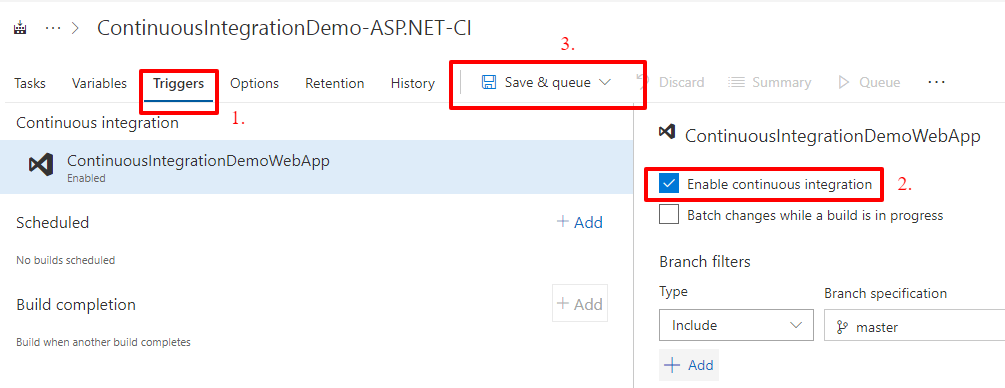
- Add Trigger and ‘Save & queue’:
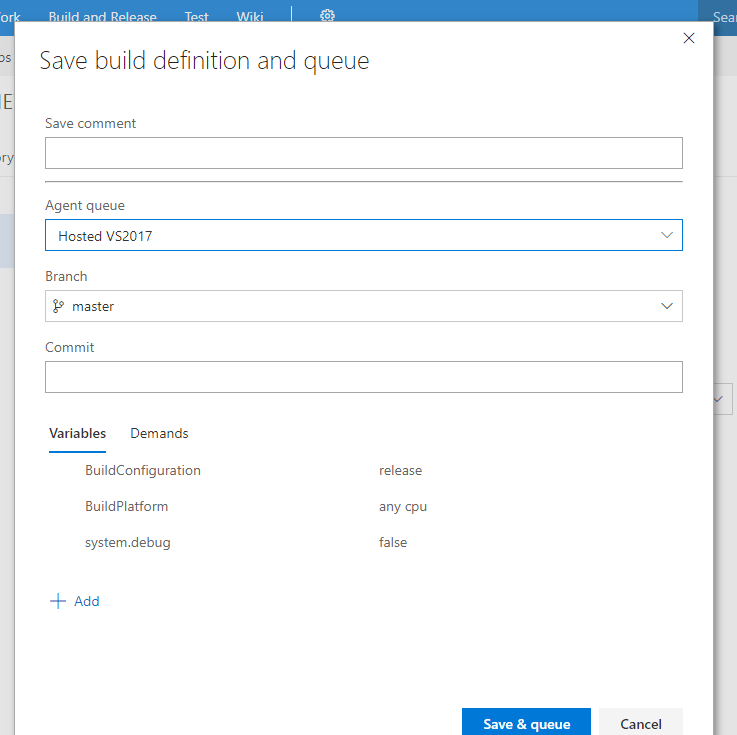
- Leave fields in the popup as they are and just save
- Click on the link that appears:
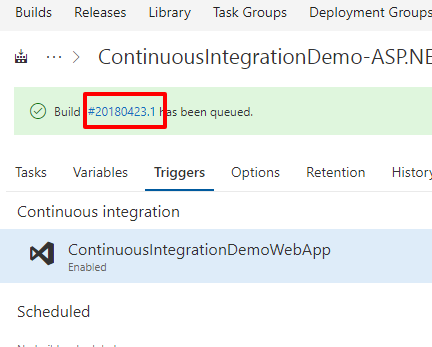
- This is the Build summary page. If you have unit tests in your application you can view them here:

Now every time you change your solution and commit your changes to VSTS your build will trigger and run in VSTS and any tests you have created will also run.
Next you will want to set up Continuous Deployment for your project. Click here to continue on to part 2.